Creating a custom wig at home is an empowering, creative process that combines practical skills, patience, and the right tools. Whether you're aiming for a medical wig, a fashion statement, a cosplay piece, or simply want a bespoke style, this comprehensive guide walks you through how to make your own wigs from start to finish. It covers materials, tools, detailed steps, professional styling techniques, maintenance, troubleshooting, and tips for achieving salon-quality results at home.
There are many reasons people decide to DIY: cost savings, full control over fit and hair selection, customization of color and density, and the satisfaction of making a tailored piece. When searching for how to make your own wigs, you want a process that is reproducible, scalable, and adaptable to different hair types and caps. This guide provides that structure.
Before you begin, assemble a toolkit. Preparing in advance will speed up the process and reduce mistakes. Below is a prioritized list that covers most wig construction methods.

A precise plan reduces re-work. Start by measuring your head circumference, hairline to nape, apex to ear, and ear to ear across the forehead. Note the density and direction of hair growth you'd like to replicate. Sketch a basic cap map: mark hairline, parting zone, crown, and nape. Decide on cap type and lace size before you purchase hair. Preparation also includes pre-washing human hair bundles to remove manufacturing residues and pre-plucking lace fronts if you want a softer hairline.
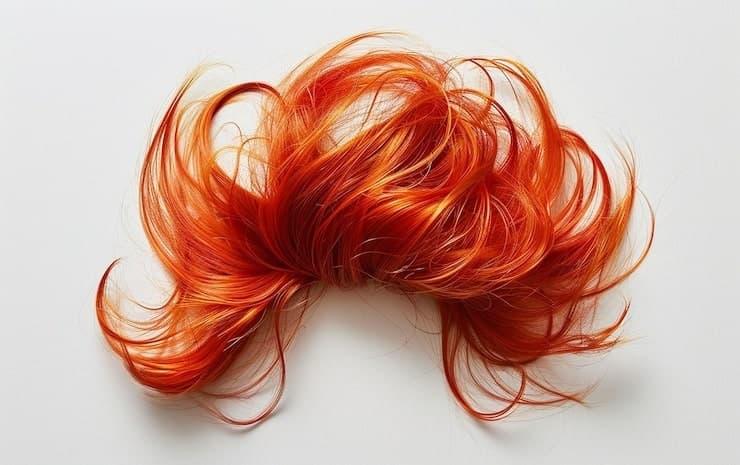
Select based on texture, length, and source. Remy human hair retains cuticle alignment and lasts longest. For budget builds, choose heat-resistant synthetic fiber and plan styles accordingly. If color-matching a client, use reference photos and sample swatches.
Stretch the wig cap over a wig block and secure with T-pins. If using a track cap, measure out the rows where you will sew the wefts, generally 1.2–1.8 cm apart depending on desired density.
Starting at the nape, align the weft and sew with a strong backstitch or use a sewing machine for faster progress. Keep tension even to prevent puckering. For natural layering, angle the weft rows slightly upward around the face and crown.
Use shorter wefts or stack wefts to create natural lift. For extra realism, blend a thin lace frontal or mono-top panel at the crown to mimic a scalp part.
Trim the cap edge close to the hairline, leaving a small seam allowance. If installing a separate lace front, sew or glue it to the cap and ventilate (or pluck) the frontal hairs to soften the line.
Secure the lace front on the block, aligning the hairline carefully. Use a thin lace that matches the skin tone for the most natural results. Mark the parting area with a washable marker.
Use a ventilating needle or small hook to knot individual strands through the lace. Choose single knots for a lighter density and double knots for durability. Work in small sections and follow the natural hair direction; the knots should lie flat against the lace.
Reduce density toward the hairline and temple areas for realism. Increase density in the mid scalp and crown. For a natural scalp illusion, leave tiny gaps and vary knots per square inch.
Once the knots are complete, rinse the lace to remove starch and gently dry. Apply a thin sealant to the knots' underside (optional) to lock them in place, especially for thin lace or heavy styling.
A believable hairline is often the difference between a wig that looks fake and one that passes as natural. To perfect the line, use a combination of plucking, bleaching knots (for lace front), and creating soft baby hairs. If you bleached knots, follow with careful toning and neutralizing to avoid brassy or translucent knots. Use a toothbrush and styling gel to lay baby hairs; trim them with sharp scissors for a feathered look.
For machine-sewn wigs, add a mono or lace top in the part area. For hand-tied pieces, ventilate a slightly sparser line along the part to mimic scalp visibility. Add a touch of concealer or foundation to the underside of lace for a perfect match to skin tone.
Place the wig on a mannequin, pin it securely, and begin with large shape cuts. Work in dry state when finalizing the style to assess fall and layers. Use thinning shears to remove bulk, and point cut to create texture. If working with long wigs, consider razor cutting to add movement. For short styles, cut with confidence and check symmetry frequently.
Only use heat on human hair or heat-safe synthetic fibers. Always apply heat protectant. Use a low-to-medium temperature and test on a small section. For long-term set styles, consider steam or rollers instead of direct flat ironing to minimize damage.
When coloring human hair wigs, pre-toning may be necessary. Use professional-grade hair color and process under controlled conditions. For lace fronts, protect the lace and avoid saturation of adhesive areas. For highlights or balayage, isolate sections carefully and use low-volume developer to reduce damage. Synthetic fibers require fiber-specific dyes or color-depositing shampoos; standard hair dye will not penetrate synthetic fibers.
Proper fit ensures comfort and longevity. Use adjustable straps, elastic bands, or combs to secure the wig. For a seamless hairline attachment, choose between glue, tape, or silicone-based adhesives. Clean both skin and lace before application and perform patch tests for adhesives. Ensure the ear tabs align with the wearer's ears and the nape sits comfortably without gaping.
Routine care will extend the life of your handmade piece. For human hair: wash with sulfate-free shampoo, condition, and use deep-conditioning treatments periodically. For synthetic: detangle with a wide-tooth comb, use wig-specific shampoo, and reshape using cold water or steam. Store wigs on a stand or mannequin to maintain shape, and keep them covered from dust and sunlight.
Always detangle from ends to roots. Use silicone-based serums sparingly to reduce frizz on human hair. For synthetic wigs, apply detangler spray designed for fibers and handle with gentle care to avoid stretching wefts or distorting knots.
Excessive shedding: Check knot security; for machine-sewn wigs ensure wefts are firmly stitched. For hand-tied pieces, consider reinforcements with knot sealant.
Visible knots or lace: Bleaching knots moderately, plucking the hairline, or using a proper skin-tone match can reduce visibility.
Cap gaping: Adjust elastic, add combs, or resize the cap for a close fit.
Stiff or matted hair: Use appropriate conditioning and avoid high heat; for synthetic fibers, use specialized revive sprays.
High-quality products make a huge difference. Choose breathable lace, sweat-wicking cap materials, and reputable adhesives. For human hair, invest in salon-grade color and treatments. For synthetic wigs, select reputable high-heat fibers if you plan to style with heat.
Time and cost vary by method and hair quality. A simple machine-sewn weft wig can take 4–10 hours and lower material cost, while a hand-tied lace wig can take 20–80+ hours and requires a larger investment in labor and materials. Factor in the costs of human hair bundles if you want long-lasting, heat-stylable results.
Integrate micro-bleached knots, split-knot ventilating for softness, and deep-part reinforcement with translucent monofilament. Consider adding scalp painting or silicone “scalp” inserts to enhance realism under bright lights or camera flashes. For hair direction, study reference images and place hairs according to natural cowlicks and flow.
When sourcing human hair, verify ethical sourcing. Avoid suppliers with questionable procurement practices. Provide clear care and warranty information to clients when selling or providing wigs to others.
Complete a final inspection: ensure even density, secure attachments, no loose threads, natural hairline, and a tested adhesive patch. Perform a comfort test, and if the client will wear the wig for extended periods, advise on breathable cap options and scalp-care routines.
Provide a storage bag, a care card with washing frequency, recommended products, and instructions for reattachment or adjustments. Include emergency repair materials: spare needles, thread, and a small bottle of adhesive.
Practice makes perfect. Start with simpler machine-sewn builds before moving to lace ventilation. Join maker communities, attend workshops, and study video tutorials that demonstrate knotting rhythm and density strategies. Keep samples of different cap builds to refer to for future projects.
In short, learning how to make your own wigs requires planning, the right tools, and a methodical approach: measure accurately, pick the correct cap and hair type, choose a construction method, take your time on the hairline and parting, and finish with professional styling and maintenance. Master the basics, then explore advanced techniques such as ventilating, knot bleaching, and scalp realism for the most convincing results.
Measure → Choose cap → Prepare hair → Weft/ventilate → Attach frontal/top → Cut/shape → Style → Fit/adjust → Care/maintain.
For those who repeatedly search phrases like how to make your own wigs online, keep experimenting with different cap constructions and hair blends and document each build to refine your approach. Use tags and photos to track progressed skill levels and common problems solved for each project.
Q: What is the easiest wig to make for a beginner?
A: A basic machine-sewn weft wig built on a stretch cap is the most beginner-friendly; it requires less time per hairstrand and teaches foundational sewing and shaping skills.
Q: Can I dye synthetic wig hair?
A: Most standard synthetic fibers cannot be dyed with regular hair dye. Use fiber-specific dyes or purchase colored synthetic hair. Heat-resistant fibers can sometimes be tinted with special inks or fabric dyes following manufacturer instructions.
Q: How long will a handmade human hair wig last?
A: With proper care, a handmade human hair wig can last a year or more with regular wear; less frequent use and meticulous maintenance can extend the lifespan significantly.
If you want a tailored step-by-step video playlist or a printable checklist for your next build, collect your material list and measurements, and plan the project over multiple sessions to maintain quality and reduce fatigue while working. Good luck on your wig-making journey — the path from beginner to pro is paved with careful practice, patience, and experimentation, and every completed wig teaches you new, valuable lessons about crafting realistic, comfortable, and beautiful custom pieces that reflect your creativity.