
If you've ever wondered how to make a lace front wig look natural, this long-form guide compiles industry-proven techniques, practical step-by-step instructions, and styling secrets from wig stylists and hair technicians. The goal is simple: transform a wig into a believable, low-maintenance look with an invisible lace line, realistic parting, and hair movement that mimics a natural scalp. Throughout this article you'll find clear explanations, product suggestions, and troubleshooting tips that focus on creating a convincing hairline and an overall natural appearance.
Wearing a lace piece that looks fake can affect confidence and comfort. Learning how to make a lace front wig look natural involves more than sticking a frontal down — it requires attention to density, color match, parting, lace blending, and styling. Small adjustments can elevate the effect from costume to couture.
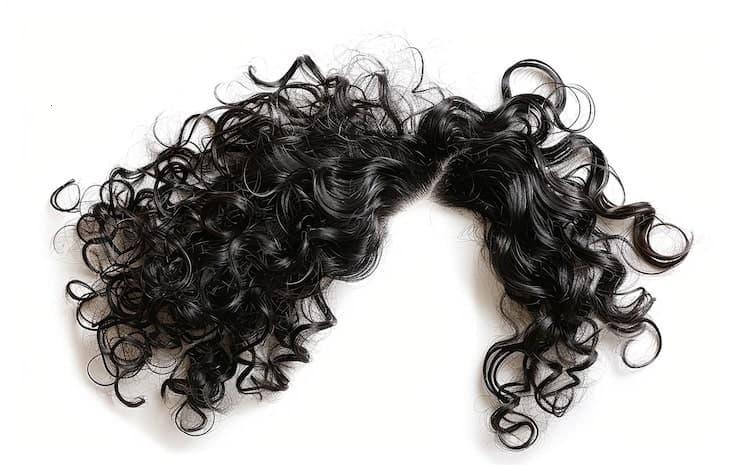
Start with the foundation: the lace itself. Swiss lace and HD lace differ in thickness, stretch, and visibility. The ideal lace choice depends on your skin tone and how you plan to install the wig. Transparent or "HD" lace can look incredible on camera and in bright light, but if you have an uneven scalp tone or plan to part the wig a lot, a lace tone that matches your skin or can be tinted may be better. When shopping, hold up the lace to your forehead to see how visible the mesh is. Also consider cap construction: a full lace cap allows multiple parting options; a lace front cap offers a natural hairline with less maintenance. Choosing the right base reduces the amount of work you'll need later to make the hairline appear natural.
Density matters. Most off-the-shelf lace wigs come with higher-than-natural density. To achieve a natural look, ask your stylist to thin the frontal in the temples and along the hairline or learn how to carefully remove excess bundles at home. Create a gradual density that mimics your natural hair — lighter at the baby hair zone and fuller toward the mid-lengths. Additionally, study natural hairlines: they are rarely perfectly straight. Use tweezers to delicately pluck hairs in small sections and step back frequently. The goal is to create tiny, irregular gaps that break the perfectly uniform row of hairs. Always pluck conservatively; over-plucking is the most common mistake.
Plucking should be done with a magnifier and good lighting. Start with light strokes with a clean pair of tweezers. Pluck in small batches, not in long lines. If the lace shows tiny dark dots at the base of each hair, consider bleaching knots to soften the appearance; bleaching lightens the base of hair where it is tied to the lace. Important: bleaching weakens hair and can slip hairs out of place, so proceed with caution or consult a pro. For undetectable knots, use a low-volume developer and carefully monitor processing time. Another option to increase realism is to ventilate (hand-tie) additional single strands into the hairline to simulate irregular growth. This is a time-consuming method but extremely effective.
Baby hairs provide a major visual clue that separates a wig from real hair. Use small sections of hair to craft delicate infant hairs along the perimeter. Trim in a variety of lengths and avoid symmetry. Use a styling gel or mousse to lay them down naturally and use a thin-tooth comb or small toothbrush for control. If the wig is installed, avoid making baby hairs too thin or overly slicked; natural baby hairs often appear slightly frizzy or flyaway. Try styling them with a light oil-based pomade for a healthy sheen.
Blending lace into skin can be done in several ways: color-matching the lace, using foundation or concealer along the part and hairline, or applying a lace tint spray before installation. When using glue, select the right adhesive for your skin type — alcohol-based adhesives dry faster and hold stronger, water-based glues are gentler and easier to remove. For a nearly invisible finish, remove the lace backing, apply your adhesive, allow it to become tacky, and carefully lay the lace down starting at the center of the hairline. Press gently and hold with a silk scarf for several minutes to bond. For a less permanent approach, medical-grade double-sided tape provides a strong hold and is easy to replace. After securing the lace, use a small amount of concealer along the part to mimic scalp color. Pat and blend, then set with a tiny touch of translucent powder or setting spray.
A convincing part is a simple but powerful trick. Use a fine-tooth tail comb to create a clean part and then apply a small amount of scalp-colored powder, cream, or foundation along the part to recreate depth. Matte products reduce shine and help the part read like a real scalp. Consider using pressed powder in a shade slightly lighter than your skin if the hair density is heavy. For deeper simulation, liquid concealer can be painted along the lace part and lightly blended. If the lace is thicker, painting a thin line of foundation on the lace under the hair can visually reduce the grid-like appearance. Always seal with a non-greasy setting spray to avoid transfer or smudging.
There are multiple installation methods and your lifestyle will dictate the best choice. For long-term wear and sport-proof security, glue or lace adhesive is ideal. If you want to change looks often or are sensitive to adhesives, an elastic band method or adjustable straps with wig tape can provide comfort and hold. When using glue, always clean the skin with 70% isopropyl alcohol to remove oils, apply adhesive in thin layers, and allow each layer to dry to a tack before pressing lace down. For a temporary, beginner-friendly hold, cut small sections of medical tape and place at the temple and nape. The tape is discreet and safer for sensitive skin. Whichever method you choose, follow product instructions and perform a patch test to prevent irritation.
Natural hair moves and has shape. If your lace front wig is made from human hair, you can heat-style it with a flat iron or curling wand to add natural movement. Use a thermal protectant spray to protect fibers. When styling, create subtle bends and waves rather than uniform curls to mimic natural hair patterns. For synthetic wigs, use styling products designed for synthetic fibers. Another helpful trick is to slightly backcomb the roots near the crown to produce volume that keeps the hair from lying flat in an unnatural way. Avoid heavy or stiff products that make hair look plasticky; lightweight sprays and creams that encourage separation and gloss are best.
To keep the realistic look over time, adopt a care routine: wash wigs gently in lukewarm water with sulfate-free shampoo, deep condition, and use detangling sprays sparingly. Store your wig on a mannequin head or padded stand to maintain shape, and sleep with a silk scarf to reduce friction and preserve the hairline. Reapply adhesives carefully and remove any lace residue with an adhesive remover designed for wigs. Regularly refresh the hairline with targeted plucking and small adjustments to baby hairs to keep the look natural as hair settles or sheds.
Try mixing a tiny amount of foundation into a hobby sponge and gently stippling the lace near the part for a subtle scalp hue. For people with very fair or very dark complexions, a thin layer of wig concealer painted beneath the lace gives depth and realism. If you plan to wear your lace often, consider a professional custom color match; salons can tint lace to achieve near-perfect invisibility. For extra durability at the temples, sew in a few small elastic strips underneath the lace to relieve tension on the adhesive.
Essential tools and products include: high-quality tweezers, wig-specific adhesive or tape, lace tint spray or matching foundation, small scissors for baby hairs, a toothbrush or small edge brush, thermal protectant, wide-tooth comb, silk scarf, and a mannequin head for styling and storage. Keep an adhesive remover and a gentle clarifying shampoo on hand for periodic deep cleaning.
Follow this condensed routine to embed many of the above tips into a simple workflow: prep skin and clean the hairline; tint lace if needed; lay wig and secure with your chosen method; pluck minimally and shape baby hairs; bleach knots if necessary; create a natural part and apply scalp powder; style with heat or product to add bends; and finally, use a silk scarf to set the hairline for 10 minutes. Repeat minor touch-ups over the first 48 hours as hair settles and adhesives bond fully.
If lace still shows after installing, try these fixes: add a light layer of lace tint along the edge, use a bit of translucent powder to reduce shiny spots, or trim lace closer to the hairline using small curved scissors. For persistent visibility in photographs, adjust lighting or use a diffuse light source to reduce the contrast at the hairline. If the lace appears to lift, reapply adhesive or use a micro-tape underneath the edge as reinforcement.
For high ponytails: create a secure foundation by flattening the hair at the crown and ensuring the lace is firmly bonded. Use hairpins and additional small elastic bands to keep the ponytail anchored without stressing the frontal. For updos: maintain some baby hairs and loose tendrils to soften the hairline and disguise any lifted lace. For athletic wear: use stronger adhesive and consider adding a thin elastic band inside the cap for extra security during movement.
Throughout this article we've emphasized the keyword how to make a lace front wig look natural in various contexts: product selection, installation, styling, and upkeep. Repeating this phrase in a helpful, contextual way helps search engines understand the article's intent while giving readers practical, actionable steps.
Pro tip: Less is more when customizing a hairline. Subtlety wins—tiny adjustments repeated over time create the most convincing results.
In summary, learning how to make a lace front wig look natural is about a combination of correct material choices, subtle customization, careful installation, and consistent maintenance. Focus on lace color, density, a believable part, baby hairs, and adhesive choice. When each detail is handled purposefully, the overall effect is seamless: an invisible lace line and hair that moves and behaves like your own.
Skill matters. If you are new to wig customization, practice on an inexpensive unit first to build confidence with plucking, knot bleaching, and adhesive use. Consider a workshop or tutorial with a professional stylist to master hand-tying, ventilation, or advanced color matching. Over time you will develop a personal routine that balances time, cost, and desired finish.
We intentionally used varied headings and keyword-rich phrases like how to make a lace front wig look natural within headers, lead paragraphs, and emphasized snippets to improve search visibility while delivering practical value to readers. Keep experimenting with small changes and measure what works for your unique face shape, skin tone, and lifestyle.
Ready to begin? Start with a cap that suits your needs, gather the essentials from the checklist, and invest a few hours into shaping a hairline that belongs to you. Natural results come from patience and intentional technique.
Disclaimer: Always perform patch tests for adhesives and hair dyes, follow product instructions, and consult a professional for major alterations to expensive units. With practice and the right approach, you'll achieve a lifelike hairline that answers the core question of how to make a lace front wig look natural.