If you are preparing to attach a lace or full-cap wig and want a secure, natural finish, this extensive guide will walk you through every detail. Learning how to install a wig with glue involves understanding materials, scalp preparation, adhesive choice, precise application techniques, and aftercare. The following sections are optimized for people searching for clear, reliable instructions on achieving a long-lasting, comfortable bond while maintaining hair and skin health. This guide emphasizes practical steps, troubleshooting, and professional tips so you can confidently install your wig at home or prepare for a salon application.
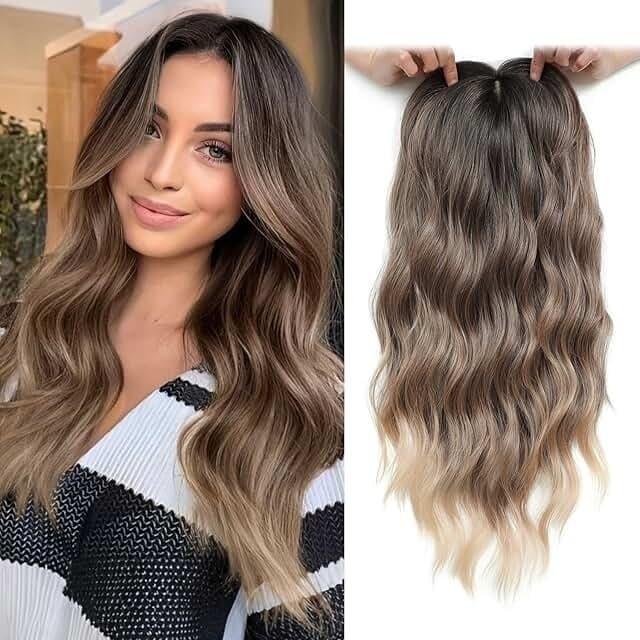
Adhesive wigs provide a low-profile hairline and greater security than some clip or comb methods. When you learn how to install a wig with glue, you gain the ability to create a seamless, natural hairline that resists wind and movement. Glue allows a flexible attachment along the perimeter of lace or skin-top wigs and can be removed without damaging the wig when done properly.
Before attempting to attach a wig, gather your materials. A well-prepared station makes the process smoother and safer. Items needed when learning how to install a wig with glue include:
Not all adhesives are identical. There are times when a tape, a liquid glue, or a gel is more appropriate. Choosing the right product is a crucial step in understanding how to install a wig with glue. Professional-grade formulas often provide stronger bonds and longer wear, while consumer adhesives can be gentler on sensitive skin.
Preparation is 50% of the result. Properly cleaning your forehead and sealing the area prevents oils from breaking down the adhesive, which is vital for maintaining a strong bond when you install a wig with glue. Follow these preparatory steps:

Follow this detailed, step-by-step plan to learn exactly how to install a wig with glue. Each step includes practical tips to avoid common mistakes and to create a long-lasting, natural appearance.
Before applying the glue to your entire hairline, perform a patch test on a small area of skin to rule out allergic reactions. Wait 24–48 hours if you have a history of sensitivity.
Bleach knots or pluck the lace if needed to customize density at the hairline, and tint the lace with foundation or lace tint spray to match your scalp tone. Ensure the wig cap fits snugly.
Some stylists recommend applying a thin layer of adhesive or bonding agent and letting it dry to a tacky finish before placing lace. This initial layer provides grip and helps the lace lay flat.
When you are ready to adhere the wig, apply a thin, even strip of glue along the perimeter where the lace will sit. For lace-front wigs this is usually along the forehead and sides. Allow the glue to become tacky—this can take anywhere from 30 seconds to a few minutes depending on your product. Never press lace into wet glue; pressing early can create lumps and slip.
Using the hairline as a guide, position the wig carefully. Start at the center forehead and move outward, aligning the lace with your desired hairline. Press lightly with fingertips or a pressed cloth to secure the lace to the adhesive layer.
Once in place, add a thin bead of glue along the edge for extra hold if you plan on extended wear. Use a blow dryer on cool to help the glue cure faster. Tie a wrap or scarf to hold the lace flat for at least 10–20 minutes while the adhesive sets. This step is crucial when mastering long-term techniques for how to install a wig with glue.
Create a natural finish by pressing down any baby hairs or using makeup to conceal the lace edge. Use tweezers to gently pull out micro hairs if you want a more natural density. A small amount of concealer or powder can match the lace to your skin tone.
For those who want to maintain extended wear, consider these professional practices:
Even with practice, problems can occur. Below are solutions to typical issues users encounter when they learn how to install a wig with glue:
Proper removal is as important as application. Pulling lace off without adhesive remover can damage both the wig and your skin. To remove a glued wig safely:
Maintaining both the wig and the natural hairline keeps the system comfortable and hygienic. After removal and regular wear intervals remember to:
Budget affects choice of adhesives and wig quality. For those who ask "how to install a wig with glue" professionally or frequently, investing in high-quality lace, professional-grade adhesive, and removal products often pays off in durability and scalp comfort. Consider buying small sizes to test compatibility before committing to large quantities.
Start with a gentle water-based adhesive if you are new; upgrade to solvent-based formulas after learning proper removal and skin care techniques. Keep adhesive remover and a barrier in your kit at all times.
Use this quick checklist to ensure nothing is missed before installation:
Consistency is the key to mastery. Practice on a mannequin head or in a salon setting before attempting a full, day-long wear. Keep your kit organized and always prioritize skin health. Remember that the question of how to install a wig with glue is not only about technique but also about choosing the right materials and adopting safe routines for both application and removal. With time, you will refine your process to achieve a realistic, comfortable, and secure result.
Knowing how often to reapply adhesives and replace wigs depends on activity level, product type, and personal comfort. Generally:
Pro Tip: Less is often more: a thinner glue line can appear more natural and is easier to remove than a heavy application.
Throughout this guide the phrase how to install a wig with glue has been emphasized to align with search queries and to help you quickly find the steps and tips that matter most. Each step is crafted to improve your results and reduce common pitfalls.
Avoid these pitfalls: skipping patch tests, using too much glue, sleeping without protection, and relying on a single product for every situation. Diverse environments and skin types require tailored solutions that you will discover through experience.
If the lace lifts unexpectedly, clean and reapply a small amount of adhesive; if irritation occurs, remove immediately and treat the area with a calming gel and consult a dermatologist if necessary. Saving small cuttings of lace to practice placement can greatly reduce mistakes when you work on the final system.
Consider watching professional tutorials, attending workshops, or booking an appointment with an experienced wig technician to get hands-on guidance. Practice, combined with scientific understanding of adhesives, will make you proficient at how to install a wig with glue.
By following the procedures in this guide you will be able to accomplish a secure, natural-looking hairline and a comfortable routine. With patience, proper products, and careful maintenance, adhesive wig installations can look indistinguishable from natural hair and allow you the freedom to live actively without worry.
If your goal is to perfect how to install a wig with glue, follow these guidelines, be patient, and iterate. Good tools, safe products, and careful technique will help you achieve a professional, natural finish every time.