If you've ever wondered how do you make a wig from scratch, this detailed, step-by-step resource is designed for absolute beginners who want to create a natural-looking headpiece using basic materials, common tools and easy styling techniques. The process can be rewarding and cost-effective, and with patience you'll learn essential skills like cap construction, knotting or ventilating hair, sewing wefts, and finishing for longevity and comfort.
DIY wig-making gives you full creative control over cap fit, hair density, hairline realism and fiber choice. Whether you prefer human hair for styling versatility or synthetic fiber for budget-friendly fashion, the handmade approach allows tailored results. Expect a learning curve: early attempts may take several hours and some practice to perfect knotting, parting and blending. This guide emphasizes safe techniques, scalable complexity, and delivering results that look professional with home tools.
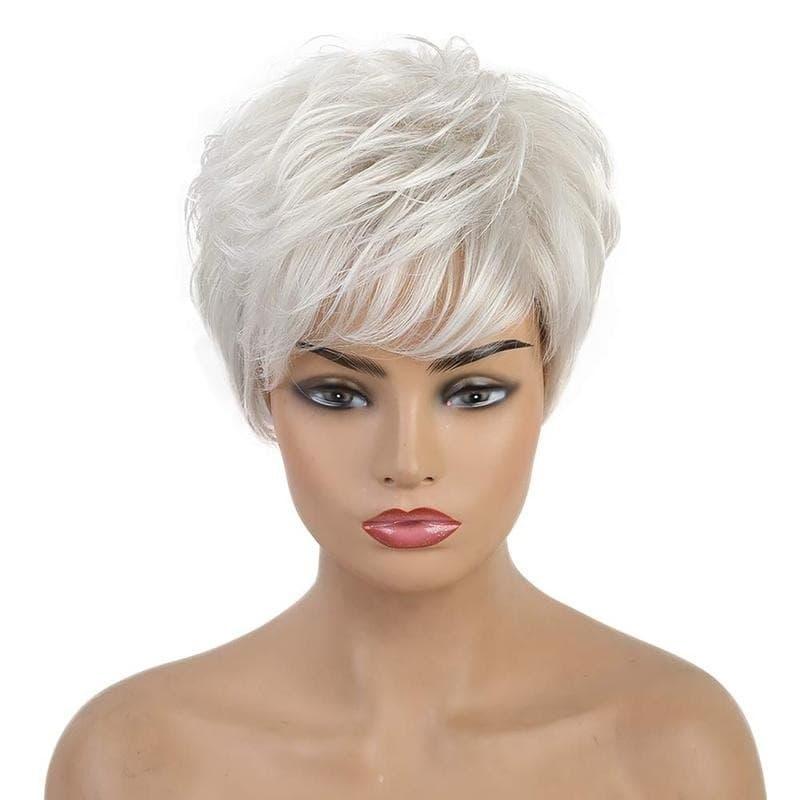
Start by measuring the head at the forehead, crown, back of head and ear-to-ear. Decide if you want a full lace front for the most natural hairline, a lace front with wefted back to save time, or a full wefted cap that is quicker to sew but less natural at the hairline. Document desired parting, density, and lace color—matching lace to skin tone reduces visible edges.
Stretch the chosen cap onto the wig block and secure it with T-pins. Use a non-slip base and make sure the cap aligns with the measurements. Mark the natural hairline, center part and ear placement using a washable marker or pins. For a snug fit, pre-sew an adjustable elastic band across ear-to-ear; this creates tension and keeps rows even when you sew wefts.
When using wefts, start from the nape and sew in horizontal rows working upward. Use a curved needle and double thread; knot securely at the start of each row. Maintain even spacing—about 0.4–1 cm between rows depending on desired density. Cross-check both sides for symmetry. For a natural fall, leave the hair near the crown slightly less dense or use shorter wefts and stagger them.
For lace fronts, hand-knotting hair into the lace (called ventilating) creates a realistic hairline and allows free parting. Use a ventilating needle or hook and tie single or double knots depending on fiber and desired hold. Single knots look more natural but can be less secure; double knots give longevity. Work in small sections, and thin out the hairline to mimic real growth by removing some fibers—use thinning shears and pluck carefully if necessary. Remember: when you're learning how do you make a wig with lace, patience and gentle, small knots will yield more realistic results.
Finish edges with a silk or satin lining to prevent scratching and to increase comfort. Sew ear tabs or lace tabs that can be trimmed and glued to the skin. Reinforce stress points—like temple areas and nape—by doubling thread or sewing a small strip of fabric to distribute tension from clips or adhesive. If you added a wefted back with a lace front, blend the seam by ventilating a few strands through the top weft to soften the transition.
Once the hair is fully attached, style the wig on the block or on your own head using a wig cap underneath for fit testing. Use long, confident snips with sharp shears to create perimeter shaping and face-framing layers. For textured and natural results, use point-cutting and thinning shears at the ends rather than blunt cuts. If the fiber is human hair, wet cutting often yields precise shaping; for synthetic fibers, cut dry and only use heat tools rated for the fiber.
Lightly pull small sections of frontal hair and cut with short, feathered strokes to create baby hairs. Use a small amount of styling gel or edge control to lay them for a polished, natural front. When using glue or tape, always test an inconspicuous area of skin to avoid irritation. Use a gentle remover to strip glue when you need to remove the wig.
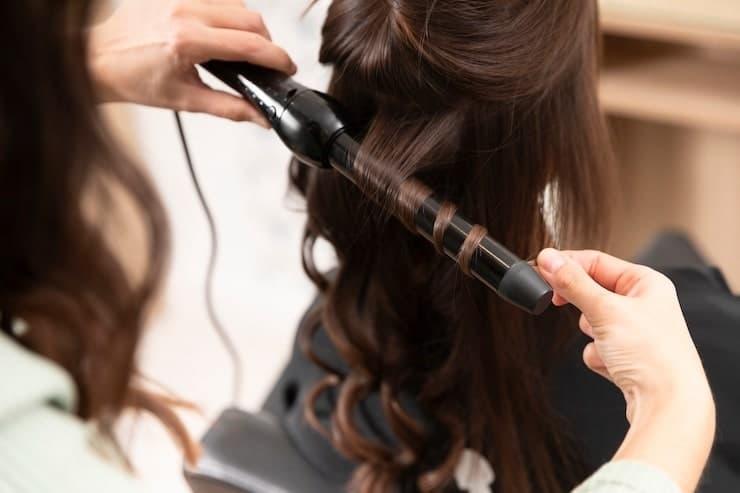
Human hair can be blow-dried, flat-ironed and curled like natural hair, but always apply heat protectant. Synthetic blends labeled as heat-friendly can tolerate lower-temperature styling; follow manufacturer guidelines. For longevity, avoid daily heat on human hair to prevent dryness—use deep conditioning treatments periodically. For color, human hair can be dyed professionally; synthetic fibers cannot be reliably dyed with standard dyes.
If you're ready to progress from basic weft-sewn caps, learn ventilation patterns for monofilament crowns, create multi-directional parts, and experiment with micro-braided or hand-tied knotting for undetectable density transitions. Use a lace tint or foundation oxidizer to match lace exactly to skin tone and reduce visibility. Consider pre-bleaching knots for transparent lace; this trick lightens knot contrast and gives the illusion that hair grows from the scalp. Always practice bleaching on sample lace first to avoid over-processing.
A basic wefted wig can cost under $100 if using synthetic fiber and pre-made caps, though high-quality human hair wigs often range from $200–$1000 depending on length and origin. Time-wise, a beginner may spend 6–15 hours constructing a full wig: measuring, sewing wefts, finishing the hairline and styling. Lace ventilation is the most time-consuming step; anticipate several hours for a lace front or a full-lace head if you are knotting by hand.
To get natural movement, vary length with layered cutting, and use directional parting to create lift at the crown. For beachy waves on human hair, use a 1-inch iron and alternate curl directions to prevent uniform ringlets. For volume, sew thin wefts in alternating directions near the crown to encourage lift. Seal ends with a light serum for human hair; use a silicone-free detangler for synthetics to maintain bounce without weighing strands down.
SEO note: incorporating the key phrase how do you make a wig throughout descriptive headings, lists and meta-like content helps surface the article for searchers seeking step-by-step home wig tutorials. Be sure to include related terms such as "ventilating," "weft sewing," "lace front," "hairline blending" and "wig care" to improve topical relevance.
Always use skin-safe adhesives and hypoallergenic tapes when affixing lace to the skin. Remove adhesives with a recommended remover and cleanse the skin. Maintain wig hygiene by washing according to fiber type and avoiding shared wear if possible. Replace wig liners every few months to prevent bacterial buildup and to preserve cap shape.
If the hairline looks too thick, remove a few rows or individually thin sections of the front. If knots show darkly on lace, consider bleach or plucking a handful of hairs to lower contrast. For tangling at the nape, apply a small amount of leave-in conditioner and ensure the wig is stored properly. If you experience shedding, inspect knots and wefts to determine if reinforcement or re-knotting is necessary.
As confidence grows, experiment with custom color placements (balayage on human hair), adding lace-tinted monofilament crowns for realistic scalp simulation, and offering made-to-measure services for friends or clients. Track each wig's construction notes—materials, time, and adjustments—so you can replicate successful methods and prices. Learning community forums, video tutorials and pattern templates can shorten your development curve.
To summarize the core answer to the search intent behind how do you make a wig: measure carefully, select the cap and fiber type, secure the cap to a mannequin, sew or ventilate hair methodically, refine the hairline, and finish with tailored styling and care routines. Each step can be simplified or made more advanced depending on whether you choose wefts, lace, or hand-tied techniques.
Invest in sharp curved needles, reliable threads, and quality lace to minimize errors. Bargain hair can save money but often sheds and tangles; weigh cost vs longevity when selecting fibers for long-term wear or pieces you intend to style and dye.
Making a wig at home is a learnable craft that combines sewing, hairdressing and design. Whether your goal is a single bespoke piece or to start a small wig-making side business, the fundamental skills—accurate measurement, even sewing or ventilating, natural hairline creation and careful finishing—remain the same. Keep practicing, and allow early builds to be experiments rather than final products.
If you want tailored instructions for a specific cap type (full lace, lace-front, glued, or glueless) or a shopping list aligned to a target budget, say which approach you'd like to pursue next and you'll get focused steps and a materials checklist.