If you own a full synthetic wig and want a softer, more realistic appearance, this comprehensive article focuses on how to thin out a synthetic wig safely and effectively. Whether you're a beginner or an experienced stylist, these step-by-step techniques, pro tips, and maintenance suggestions will help you reduce excess volume without damaging the fiber or the cap. The goal is to achieve a believable hairline, comfortable wear, and long-lasting results.
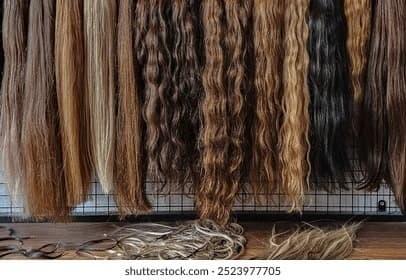
Many synthetic wigs are manufactured with dense wefts to give volume, but that density can read as artificial under certain lights or with close inspection. Learning how to thin out a synthetic wig improves movement, reduces bulk under hats or scarves, and enables you to style the wig more naturally. Thinning also helps with heat management and reduces the weight that pulls on your scalp during extended wear.
Before you start any mechanical thinning or cutting, test your method on an inconspicuous section at the nape or under an ear. This determines how the synthetic fiber reacts to the tool—some techniques create little frizz while others can make the strand ends look blunt.
Below are seven distinct approaches, each described with step sequencing, typical outcomes, and pro-level troubleshooting. Pick one or combine multiple methods depending on your wig density, fiber type, and desired end result.

1) Place the wig on a stand and secure with a pin or two to prevent shifting.
2) Use a tail comb to partition hair into horizontal layers, starting at the nape moving upward. Clip upper sections away.
3) With thinning shears held vertically near the ends of a 1–2 inch section, make gentle open-close snips toward the mid-lengths—do not approach the root too closely.
4) Work through layers slowly to keep the silhouette balanced. This method reduces surface bulk while keeping length intact.
Point cutting uses scissors to create a feathered edge and is excellent for hairlines and face-framing pieces. Hold a small subsection between fingers and snip vertically into the ends at an angle. Repeat across the perimeter for a softer edge. Always comb and inspect the fall of fibers before moving to the next area.
Some wig-grade razors or disposable head razors offer a controlled way to remove excess fiber. Glide the razor gently along the direction of hair growth, focusing on internal bulk rather than outer layering. Avoid aggressive back-and-forth strokes; those can fray synthetic ends. For many synthetic fibers a razor tool produces a natural, tapered finish, but test first.
Professional thinning shears have notched teeth that remove a percentage of hair with each cut. Work section by section; open the shear and insert 1–2 cm away from the scalp and close slowly, moving down the section. Repeat with even spacing. Thinning shears are one of the safest ways to manage volume without altering length drastically.
This technique addresses heavy bulk at the crown or interior. Using small scissors and a seam ripper, remove selective wefts from the inside cap. This reduces weight and allows the wig to sit flatter. Proceed slowly to avoid creating holes in the cap; remove only every other or every third weft section initially.
If the fiber is labeled heat-friendly, you can use a low-temperature flat iron or curling iron at the manufacturer-recommended setting to reset movement after thinning. Slight heat can help seal the ends and reduce the appearance of frazzing. Always start at the lowest effective temperature and protect the fiber with a light silicone-based spray for synthetics.
After bulk reduction, comb through the wig and identify any harsh lines or inconsistencies. Use point cutting to soften transitions and a light spritz of wig conditioning spray to help fibers settle. Check the hairline and parting under bright light to ensure the result looks natural from multiple angles.
Professional results come faster when you use purpose-built tools. The core toolkit includes: thinning shears, a light-duty razor for wigs, a tail comb, wide-tooth comb, wig stand, fine-tooth brush, clips, and wig conditioning spray. For those on a budget, carefully sharpened household scissors plus a disposable eyebrow razor can work—just proceed with smaller increments and more testing.
- Take photos before each major change. Documenting progress helps you reverse course if needed.
- Work in natural light when possible to see true texture and density.
- Keep a small stash of replacement wefts or a wig repair kit for more advanced corrections.
- For frontal or lace wigs, maintain a softer hand near the lace to avoid visible bluntness.
Once you learn how to thin out a synthetic wig, styling becomes easier. Lighter wigs respond better to styling sprays, light curls, and waves that mimic natural hair movement. Try low-tension braids or loose waves rather than heavy teasing, which defeats the purpose of thinning.
Thinned synthetic wigs require routine care: detangle gently using a wide-tooth comb from tips toward the roots, store on a stand to retain shape, and avoid vigorous towel drying. Use wig-specific cleansers and conditioning sprays—these maintain fiber suppleness and reduce the likelihood of split or frayed ends after thinning.
Frequency depends on wear patterns and fiber type. A densely packed wig may need one or two thinning sessions over its usable life, while lighter wigs rarely need more than occasional point-cut maintenance. Always allow time between sessions to observe how the wig settles.
After each thinning session, step back and evaluate under different lights. If the wig looks patchy, add gentle blending rather than more aggressive removal. If frizz appears, trim the offending pieces lightly and apply a small amount of synthetic fiber protectant. If shape is lost, reintroduce subtle layering around the perimeter to rebuild silhouette.
If the wig is expensive, handmade, or you’re working with lace fronts and custom caps, professional thinning can preserve value. Experienced stylists can strategically thin while keeping cap integrity intact. For complex repairs like rewefting, a pro is strongly recommended.
To recap, learning how to thin out a synthetic wig involves choosing the right technique—layering, point cutting, razor work, thinning shears, internal weft removal, controlled heat on heat-safe fibers, and final blending. Each approach reduces density in specific ways while preserving natural movement. Use gentle, incremental adjustments and always test on a small area first.

If mechanical thinning seems risky, consider layering a lighter wig over a cap or using styling accessories to reduce perceived bulk—hats, scarves, or headbands can disguise dense bases while you plan a more permanent thinning session. For costume or cosplay wigs, creative trimming combined with styling products often yields convincing results without extensive tool use.
After refining density, groom the parting: use a concealer powder or a light application of matte foundation along the part to mimic scalp depth. For lace fronts, pluck minimal hairs and soften the hairline using tiny point cuts. Sealing with a wig-friendly finishing spray helps set the style and minimize flyaways.
Perform small experiments on spare synthetic strands to learn how a particular fiber type reacts to thinning techniques. Build a personal reference library of outcomes—this is invaluable for matching methods to fibers in future projects.
Mastering how to thin out a synthetic wig unlocks a more natural appearance, greater comfort, and enhanced styling freedom. By following the seven techniques, testing first, and prioritizing gentle, incremental changes, you can transform a dense synthetic unit into a wearable, believable hairpiece that suits daily or special-event use.
Short answer: not significantly if you use thinning shears or point cutting carefully. These methods remove internal bulk and texturize ends rather than chop length. However, aggressive trimming or using regular scissors improperly will shorten the wig.
Most synthetic wigs can be thinned, but approach with caution. Heat-sensitive fibers cannot be reshaped with high temperatures. For premium or hand-tied pieces, consider professional service. Always test on a hidden area first.
Use light conditioning sprays made for synthetic fibers, avoid excess heat, and trim any split or jagged ends with sharp, clean tools. Small final trims and a light finishing spray help fibers lay smooth.
By integrating these strategies and maintaining careful technique, you'll gain confidence in refining synthetic wigs to mirror the texture and volume you prefer while keeping the cap intact and comfortable for long-term wear.