If you want professional results and long-lasting, natural movement from a wig, learning how to style human hair wigs is the most valuable skill you can invest in. This comprehensive guide explains the step-by-step process, pro tips, and maintenance routines that will keep lacefronts, full-lace, and machine-made human hair pieces looking salon-fresh. Throughout the article the phrase how to style human hair wigs appears in key headings and highlighted spots to reinforce the most important search intent while helping you retain a methodical workflow for real-world styling and care.
Human hair wigs behave like natural hair because they are made from real hair strands, which means they accept heat, chemical products, and manipulation in similar ways. However, differences in manufacturing, cap construction, donor source, and prior processing (like coloring or perming) will affect how you approach cutting, heat application, and styling. Understanding these variables is central to effective techniques for how to style human hair wigs and for achieving durable styles that still look natural.
Before you begin practicing techniques to learn how to style human hair wigs, gather a toolkit of salon-grade essentials: quality heat tools with adjustable temperature, a vented paddle brush, a wide-tooth comb, a fine-tooth comb for parting, sectioning clips, wig stand or mannequin head, silicone or cloth head form for gluing and cutting, thermal protectant spray, lightweight styling oils, smoothing serums, flexible hold hairspray, mousse for volume, and clarifying shampoo and deep conditioner for preparation. Include a silk scarf and satin storage bag for overnight preservation.
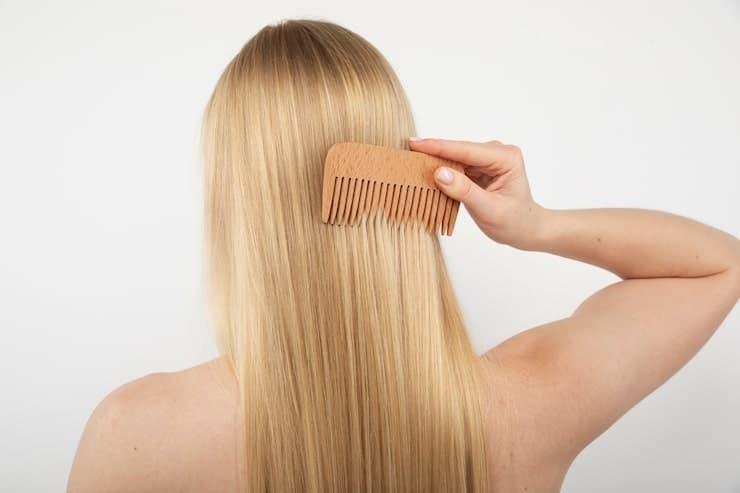
Always start by evaluating the unit. Remove dust and tangles with a wide-tooth comb, then shampoo with a sulfate-free clarifying cleanser designed for human hair wigs. Condition generously, focusing on mid-lengths and ends, not the base where adhesive or knots may exist. Use cold water for the final rinse to seal cuticle and preserve shine. Drying should be done on a wig stand or mannequin to maintain shape; blot with a microfiber towel and let the cap air-dry until 70–80% before using heat, or use a blow dryer with a diffuser on low temperature to avoid excess stress.
Natural-looking wigs are shaped to mimic a real head: remove bulk, add layers, and create subtle face-framing pieces. When learning how to style human hair wigs, cut dry and work slowly — hair falls differently when wet. Use long point-cutting motions, avoid blunt mass removals, and always check symmetry. For long wigs, internal layers reduce weight, add movement, and help curls or waves sit correctly. Remember: less is more — you can always remove more length, but you can’t add it back.
Human hair accepts heat well, but controlled temperatures and heat protectants are non-negotiable. For curling, use a 1–1.5 inch barrel for long hair to create flexible waves that can be brushed out for a natural finish. For straight looks, flat irons with ceramic plates at moderate heat (270–350°F / 130–177°C depending on hair condition) smooth cuticle without frying fibers. Always test a small hidden section first to find the safe heat level. When you style, section hair into manageable parts and use clips to isolate each area.
Set curls using alternating directions and avoid curls that all face the same way — the result is unnatural. Wrap mid-lengths to ends around the barrel, leave roots out to keep volume natural, and pin curls with clips to cool before releasing; cooling sets the shape and extends wear time. Finish with a light-mist flexible hair spray and a few drops of a lightweight oil for sheen.
One of the most important aspects of convincing styling is softening the hairline. Create delicate baby hairs using small, flat-cut sections and a toothbrush or a small tooth comb with a touch of gel or edge control. Pluck sparingly along the lace if necessary to create irregularity; avoid over-plucking. Use concealer or foundation that matches your scalp tone under the lace to eliminate visible contrast, but blend carefully so the lace remains undetectable.
How you attach the unit affects styling options. Skin-safe wig adhesives and tapes provide a secure bond for active days, while glue-free methods like wig grips or adjustable straps are better for frequent wearers who prefer quicker removal. When bonding, remember to prep skin with alcohol wipe, apply thin glue layers and allow tackiness before setting the lace. For long-term wear, use scalp protectant barrier sprays and always remove adhesives gently with a proper solvent to protect lace and hair knots.
Human hair wigs can be colored, but coloring requires nuance. Semi-permanent color is less damaging, while permanent color and bleaching will weaken fibers. When professionals are available, consult a colorist experienced with wig hair. If you color at home, test a strand, use lower volume developers, and immediately follow with deep conditioning. Highlighting and lowlighting can add dimension that helps hide wefts and make styling more natural.
Heat tools can temporarily alter texture; chemical texturizers will permanently change the hair and should be avoided unless done by an expert. For temporary texture change, use steam rollers, flexi-rods, or hot rollers for safer shaping without direct high heat. For tight curl patterns, use leave-in creams and diffuse on low heat to redefine without rough handling. When reversing to straight, work in small sections, use a ceramic or tourmaline flat iron, and seal with a light serum to smooth flyaways.
Hydration is the backbone of longevity. Use moisturizing shampoos sparingly and deep condition every 6–10 wears depending on exposure to sun and pollutants. A weekly or biweekly leave-in conditioner and detangling with a wide-tooth comb from ends to roots prevents knotting. Avoid sleeping on unprotected pillows; instead wrap hair in a silk scarf or place the wig on a satin pillow to reduce friction.
When traveling, secure the wig in a breathable bag, not plastic; compression can flatten styles and damage lace. Stuff a cap with soft cotton or tissue to preserve interior shape, and lay the unit flat in a hard-shell case if possible. For long-term storage, place the unit on a stand away from sunlight and dust; apply a light protective oil to ends before storing to prevent dryness.
Whether you aim for beachy waves, pin-straight salon looks, textured layers, or soft updos, each aesthetic has a recommended workflow. For romantic waves, alternate barrel directions and finish with a texturizing spray. For sleek ponytails, smooth with a medium-hold gel and wrap a small hair section around the elastic to conceal any weft. For braided styles, moisturize lightly to prevent frizz and braid tightly near the root for lasting shape.
Combine thermal styling with mechanical setting (rollers and pins) for long-lasting results: heat each section with a flat iron then wrap and cool to lock shape. This hybrid approach is one of the best-kept secrets among stylists who teach how to style human hair wigs for events like weddings and photoshoots.
Refresh a worn wig in under ten minutes: lightly mist with a detangling spray, finger-comb to reposition part, use a small flat iron to tame a few stray strands, and set with a micro-mist of flexible hairspray. Replace any adhesive edges if necessary and refresh baby hairs with edge control. This quick routine preserves most styles and prevents deeper tangling that requires heavy rework.
Signs that a wig needs repair include excessive shedding, thinning density, knotted cap, and visible lace degradation. Minor repairs like re-taping knots or restringing elastic can be done by professionals; however, once fiber integrity declines due to repeated high-heat or chemical exposure, replacement may be the most cost-effective choice. Investing in a second good-quality unit for rotation dramatically increases lifespan for both wigs.
1) Use a clarifying wash before any major styling to remove product buildup for more predictable heat response. 2) Set your hair on alternating directional curls then finger-comb for a lived-in finish instead of brushing. 3) Apply a thin veil of dry shampoo at the roots to reduce shine that reveals lace. 4) Use color-correcting concealers beneath lace for varying skin tones. 5) Keep a small sewing kit and some matching thread to tighten wefts if necessary.
For very long or dense units, create internal shaping layers to remove bulk and prevent a heavy “shelf effect” at the back of the head. For fine, low-density wigs, build volume with light foaming mousse and root-lifting techniques rather than heavy products that will weigh hair down. These adaptations are practical lessons in how to style human hair wigs that help each unit perform optimally.
Choose products with nourishing oils (argan, jojoba), heat protectants containing silicones or film-formers for thermal defense, and humectants like glycerin in moderation. Avoid products with excessive alcohol content that can dry fibers over time. Clarify occasionally but follow with a protein-balanced deep conditioner to keep cuticles resilient.
If curls fall too quickly: lower heat slightly and use cool-pin setting to lock shape. If hair tangles at nape: reduce friction by trimming internal bulk or using a smoothing balm. If lace becomes visible: reapply adhesive and adjust parting; tint lace with foundation or lace tint spray for a seamless blend.
You can own the most expensive curling iron, but without measured technique you risk damaging a unit and achieving unnatural results. Prioritize sectioning, temperature control, and cooling phases. These details are the difference between an amateur attempt and a polished salon-quality outcome — the essence of learning how to style human hair wigs properly.
For photo or film work: pre-style units slightly tighter than the final look because camera lights and humidity relax styles more quickly. Use micro-keratin bonding or ventilating repairs for visible part lines. Keep a mini emergency kit with adhesives, clips, and a small steamer to refresh styles between scenes.
When investing in human hair wigs prioritize ethically sourced, traceable vendors to ensure sustainable practices. Humanely sourced hair tends to be more uniform and responds better to coloring and heat, which makes styling more predictable and safer for longevity.
Start with assessment and gentle care, move methodically through cutting and heat application, and finish with blending and proper attachment. Maintain moisture, storage, and rotation to extend life. These steps form a repeatable system for anyone seeking to master how to style human hair wigs whether you are a beginner, a content creator, or a professional stylist.