If you search for "how to lay a lace wig" and expect one quick trick, this long-form guide is designed to transform that search into real, repeatable results. Whether you are a complete beginner or someone who has tried installations before, this article covers the essential concepts, tools, and techniques to achieve a flawless, natural finish. You will find within: preparation steps, product choices, adhesive and non-adhesive methods, customization tips, troubleshooting and long-term maintenance advice. Every step is explained so you can follow along confidently and avoid common mistakes while learning how to lay a lace wig correctly.
Installing a lace wig poorly can lead to visible lace lines, ill-fitting caps, discomfort, or even damage to your natural hair. Conversely, knowing how to lay a lace wig the right way gives you a seamless hairline, secure wear, and a result that looks indistinguishable from natural hair. This guide prioritizes longevity, scalp health, and aesthetics.
Begin with a clean, dry scalp. Remove oils with alcohol or gentle cleanser to ensure adhesives bond correctly. Braid or flatten your natural hair into cornrows or use a wig cap for a smooth base. If you have edges you want to preserve, use a scalp protector product and a soft brush. Taking time here improves comfort and prevents lifting.
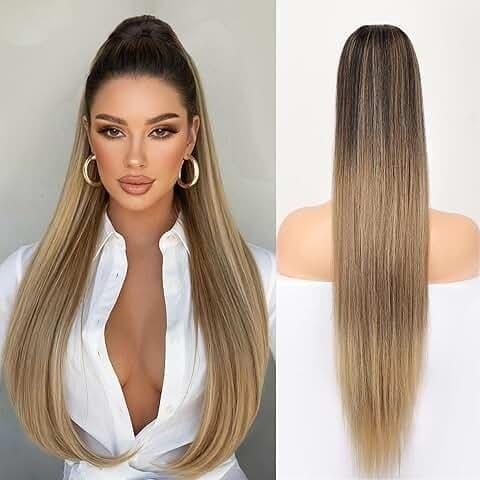
There are several lace options—Swiss lace, HD lace, and transparent lace—each offering different transparency and durability. HD lace gives a near-undetectable hairline on camera, while Swiss is easier to handle and repair. Select lace that matches your skill level and desired finish.

Before any adhesive, place the wig and confirm crown placement and ear tabs align. If the cap is too large, bring the tabs together or sew-in adjustable straps. For beginners, securing the wig with wig clips or combs to the braids can help during glue application.
Glue offers strong hold but requires more skill. Apply a thin, even layer of adhesive to the hairline using a small applicator. Allow the glue to dry until tacky—this timing is crucial. Press the lace gently, starting from the center and smoothing outward. Use a blow dryer on cool for 10–20 seconds to set the bond. To remove, use a proper adhesive remover to protect your scalp and lace.
Tape is beginner-friendly and less messy. Cut tape into small strips, apply them along the perimeter, remove the liner, and press the lace onto the sticky strips. Tape may need replacing after a few days depending on activity and environment.
Glue-less methods are ideal for sensitive skin and temporary wear. An elastic band can be sewn into the wig for a snug fit; wig grips provide friction without adhesive. Combs or clips sewn into the interior anchor to braids or natural hair for extra security.
Frontals vs closures: A lace frontal covers from ear to ear and allows versatile parting; closures cover a smaller area and are typically limited in parting. The basic principles of how to lay a lace wig are the same, but frontals need more careful blending at each temple and sometimes require additional knot customization.
Add subtle concealer along the part and hairline, then use a small makeup brush to stipple for a more realistic scalp appearance. Lightly melt the lace with an edge control and low blow dryer heat to hug the scalp like real growth. Consider tinting parting space with a brow powder or scalp concealer for depth.
Rotate adhesive types when possible and wash the wig gently every 2–3 weeks depending on wear. Use sulfate-free shampoo and conditioner. When removing adhesive, never rip the lace; instead, soak adhesive remover into the hairline and gently lift the lace. Store on a mannequin head to preserve shape and prevent tangling.
Choose adhesives formulated for lace wigs with skin-safe ingredients. For beginners, start with double-sided lace tape or a gentle alcohol-based adhesive to learn placement. Use a lightweight mousse or curl cream formulated for synthetic blends if your wig contains processed fibers. Investing in a quality HD lace and mid-weight cap drastically increases the believability of your installation and reduces the amount of time spent on modifications.
 Clean the area, reapply a thin adhesive layer, and press down with an elastic band until set.
If you are learning how to lay a lace wig, start with tape or wig grips. Practice the placement and trimming on a mannequin head until you develop confidence. Move on to liquid adhesives as your steady hand improves. Mastering the basics first reduces product waste and raises the success rate of each wear.
Do not leave strong adhesive on the scalp for extended periods. Always patch test products 48 hours before full application. Give your natural hair breathing time between installations—alternate protective styles and ensure you moisturize and oil your scalp regularly.
Once your lace sits naturally, you can experiment with center parts, deep side parts, updos, and ponytails. For high ponytails, reinforce the hairline with additional adhesive or an inner comb to prevent movement. When pulling hair back, pay attention to baby hairs and the edges to maintain a natural look.
Secure loose edges with a bit of edge control, reapply powder to the parting if it looks shiny, and smooth flyaways with a light serum or hairspray. Quick daily attention can keep an install looking fresh for days or weeks, depending on adhesive choice and activity level.
DIY installations save money and build skills, but a professional stylist can offer advanced customization, knot bleaching, and bespoke hairline shaping. If you’re preparing for a special event, consider a professional install then practice for everyday wear.
Humidity, sweat, and oily skin reduce adhesive longevity. If you reside in a hot or humid climate, choose stronger adhesives rated for active lifestyles, perform a secure installation, and consider weekly maintenance checks.
Learning how to lay a lace wig blends preparation, product knowledge, and technique. Focus on scalp prep, lace customization, adhesive application, and maintenance. Start simple, build skills, and gradually incorporate advanced methods such as knot bleaching and hand-plucking for a truly natural hairline. With practice, you’ll achieve consistent, realistic results that rival professional installations.
A: With good adhesive, scalp care, and daily maintenance, single installations commonly last 1–3 weeks; with gentle removal and proper wig care, the wig itself can last months to years depending on quality and how it’s treated.
A: Yes. Start with tape or wig grips, practice trimming, plucking sparingly, and use concealer/powder for a scalp match. Gradually progress to glue methods as you become more confident.
A: Not always. Bleaching knots reduces visibility of dark knots on light scalps but can weaken hair if done poorly. Alternatives include knot tinting or using HD lace to reduce contrast.

Final note: mastering how to lay a lace wig takes patience and experimentation. Every head, skin type, and wig will behave slightly differently, so record what works, adjust techniques, and prioritize scalp health as you refine your craft.